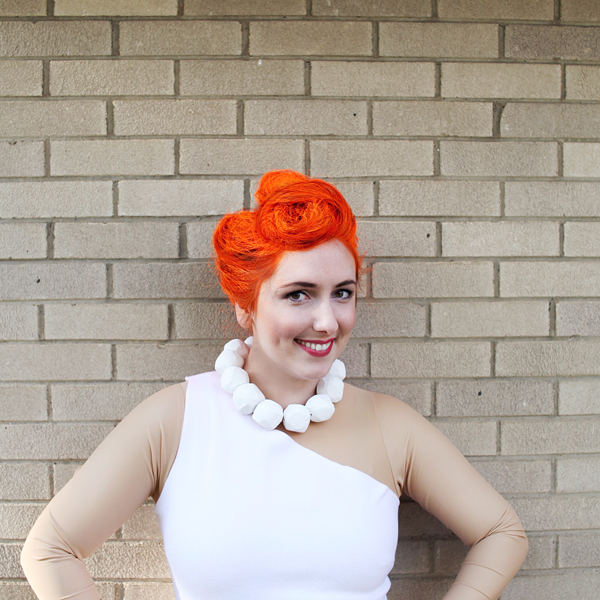
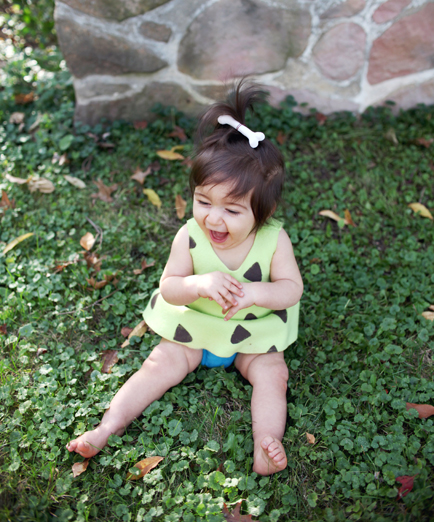
These DIY Flintstones costumes will have you looking like you're straight out of Bedrock


This article originally appeared on Babble and is reprinted with permission.
Nostalgic Halloween costumes are often the most loved and memorable. Vintage cartoons rank pretty high in the nostalgia department, and The Flintstones were a favorite of mine when I was a kiddo. Thankfully, I have a little girl with a beautiful head of hair perfect for a Pebbles look alike. Sure, none of us have red hair, but that didn't stop us from dressing up as the Flintstones this year!
Check out these crafty DIY Flintstones costumes to make your own Fred, Wilma, and Pebbles Halloween costumes this week, or to plan ahead for years to come!
Meet the Flintstones
We're not from Bedrock, but thanks to yards of fleece and some modeling clay, we look like a modern Stone Age family! Check out the following slides to see how we created our homemade Flintstones family costumes.
Accessories Supplies
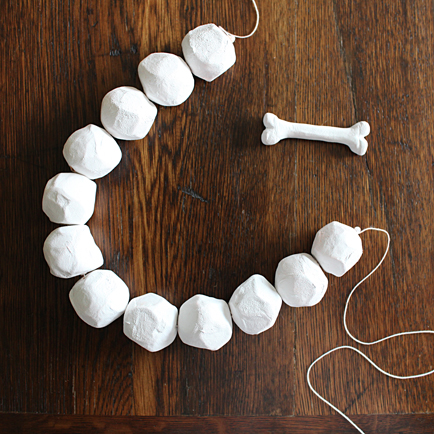
To begin, I needed to make Wilma's "stone" necklace and Pebbles' little bone for her hair accessory.
All I needed was:
- 12 1.5 inch styrofoam balls (found in the floral department of a craft store)
- white air-dry modeling clay (similar or the same as porcelain clay)
- 2 bamboo skewers
- at least 24 string or ribbon with an embroidery needle
Accessories
To make Wilma's necklace, I covered each styrofoam ball with a thin covering of modeling clay, in a similar pattern to how a baseball is wrapped with leather- in two strips. I rolled the clay until it was a smooth ball, skewered it with a bamboo skewer (6 balls fit on each skewer), and then let the clay dry for about an hour for it to harden a bit. After the clay was a bit stiffer, I removed each ball from the bamboo skewers and used a flat object to press each ball at different points to give it different facets that you might expect on a rock. Then I pierced the ball again, careful to maintain its new shape, and allowed it to dry for 24 hours.
For Pebbles' bone, I rolled out a small portion of clay into a long piece, making sure the ends were bulkier than the center. I shaped the bone's end with my hands, but used a bamboo skewer to help form the dips in the bone. I used my fingers to smooth out the middle, transitioning nicely into the ends of the bone, and let it air dry for 24 hours. I used a small rubber band to attach it to my daughter's already styled ponytail when it was costume time.
Fabric Supplies
For the costumes, I used mostly inexpensive fleece fabric purchased on sale at JoAnn Fabrics, so I wouldn't have to worry about finishing the hems of any of the clothing. Fleece is also super cozy and warm, which is a bonus when making rather skimpy Halloween costumes like these! Here are the portions I purchased:
- For Wilma's dress: 1 1/2 yards white fleece
- For Fred's tunic: 1 1/2 yards orange fleece
- For Fred's necktie: 1/4 yard of turquoise cotton and 1/4 yard of thing fusible interfacing
- For Pebble's diaper cover and top: 1/2 yard of turquoise fleece, 1/2 yard lime green fleece, and 1/2 yard elastic
Trace A Dress
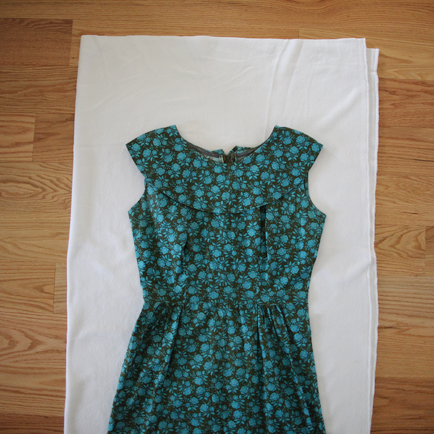
To make Wilma's dress, I folded the white fleece n half to save cutting time, and traced around a dress I liked in my own closet. I left a half inch around the edges for hem allowance, and I even cut out around both sleeves, waiting until after the dress was completely trimmed out before I decided where to cut a high-neckline one shoulder style. It's always a good idea to cut more than you need, and then trim it later.
Keep in mind that you should cut your white fabric longer than the dress you are tracing, because the bottom of your final dress with have a jagged edge, therefore a shorter "hemline." (There really is no hem, though, because you won't need to hem the fleece fabric.)
Cut Out The Dress Pieces
Because I have a bit of sewing experience, I decided to cut the bodice separately from the skirt. I sewed darks on the bust of the front of the bodice and two darts up the back of the bodice. I also sewed pleats in the front and back of the skirt to give it more of a bubble shape. Then I attached the bodice to the skirt, after trying each part on to ensure a proper fit. Before attaching the parts, I made sure the diameter of the waistline was the same size on the bodice as the skirt.
If you don't feel comfortable doing this much sewing, it's perfectly acceptable to simply trim around a dress and stitch up the sides of it. Fleece is a somewhat stretchy fabric, so it will be forgiving. And besides- you're only wearing it once, so it certainly doesn't need to be perfect or time intensive!
Sew Together Dress Pieces
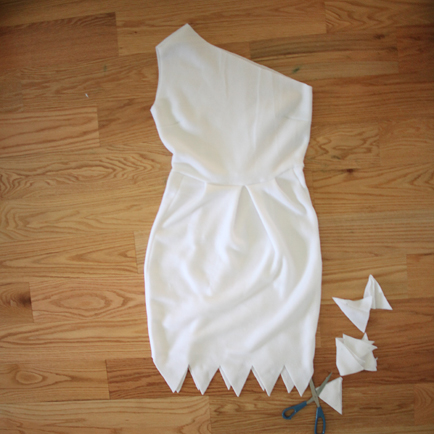
After you sew together the front and back of the dress (or front, back, top, and bottom as I did), you will need to cut the jagged edge of the bottom of the dress. I used a ruler to measure out equal points before cutting, but it doesn't need to be perfect. Some might say it's even better for it to be uneven and more haphazard looking.
The great thing about fleece is that you just need to cut the edge, and no further hemming is needed! So quick and easy!
Trace And Cut Around A T-Shirt
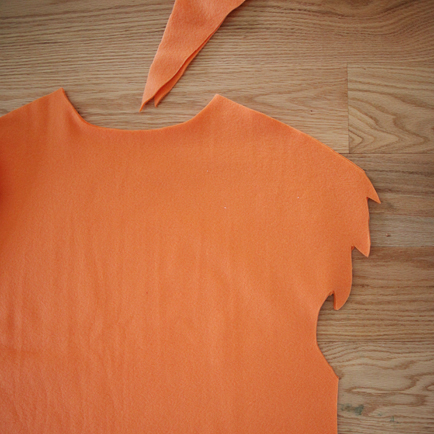
For Fred's tunic, I used a large T-shirt (larger than what my Fred would actually comfortably wear on a daily basis), laid it over top of the folded orange fabric, and traced around it, keeping the same width all the way down to the bottom of the fabric. It's better to cut a longer tunic and trim it later than to cut it too short to begin with!
For the shoulders, I cut about a 3 inch sleeve to just give it a capped length- a bit more than sleeveless, but not quite an actual sleeve.
After trimming out the front at the back, I stitched along the top of the shoulders and sides to create the tunic. When finished, flip it right-side out, have your man try it on, and trim it to a few inches below the knee before giving it a jagged hemline the same way you did for Wilma's dress.
"Feather" the Edges and Stitch Together
It's important to give the sleeves a somewhat jagged look too, and this can be done before or after you stitch together the shoulders and sides of Fred's costume. I cut mine beforehand, but decided it needed to be trimmed back after my man tried it on. It was a quick and simply tweak.
Make the Tie
For the tie you should cut the turquoise cotton in half length-wise and layer it this way- fusible interfacing on the bottom, turquoise cotton in the middle, and turquoise cotton on the top. Cut a jagged shape with all three fabrics stacked, and then stitch along the edges. Don't make the jagged edge too fine or it will be too difficult to pull out the detail when the finished tie is flipped right-side-out after stitching.
While stitching around the edge of the tie, be sure to leave a 2-inch space unsewn so that you can flip the tie right-side-out. After flipping it right-side-out, use a pin to pull out the jagged edges from inside the tie, and then use a hot iron to press the tie out. Finally, sew together the 2-inch space that was left unsewn in order to flip the tie.
Trace, Trim, and Stitch Together the Top
I created Pebble's top in the same way I created Fred's tie, but made the shape of it flare out more to give it more of a babydoll style. To get the shape of the neckline just right, I traced around round objects found in my kitchen and trimmed it out. The shape of the front was a bit deeper than the round shape of the back. I stitched together the front and back pieces in the same way I did for Fred's tunic.
For the diaper cover, I actually used a cloth diaper as a guide for cutting out my fabric. It was so quick and easy!
Cut Out Stencils
After Fred and Pebbles' tunics were made, it was time to give them spots! I used contact paper and cut out a rounded triangle shape to use as a stencil.
Paint Spots
Painting the spots was so easy! I just stuck the contact paper onto the fabric, used dark brown acrylic paint and a foam dabber to paint the spots, and pulled up the contact paper to reuse for each spot on the entire side of the tunic.
I allowed the tunics to dry for a few hours before flipping them over and doing the other side. There was no need to put paper in between the layers of fabric, because the paint didn't seep through. I did need to make two stencils for each tunic- one for the back and one for the front, because they lost their stickiness after working on one side.
Style Wilma's Hair
Wilma's hair was the most detailed aspect of the costume, and I wanted to be sure to get it just right! This style took about 30 minutes after some trial and error (15 minutes if I had practiced first), and two bottles of toxic orange hair spray. Yuck! Make sure you head outside to spray your hair- it's crazy how potent that stuff is. Check out the full hair tutorial on my personal blog to see how to recreate this look using your very own hair.
Style Pebbles' Hair
For Pebbles, I just pulled her baby hair up into a brown elastic ponytail holder, and used another ponytail holder to attach the clay bone that had hardened for at least 24 hours. It was simple, and I think my daughter thought it was pretty funny!
A Modern Stone Age Family
To finish out our outfits, I wore nude shoes to imitate a barefoot look, and my husband wore flip flops, because image that- he doesn't have any nude pumps! Gee whiz! For modesty's sake and to cover my tattoos, I wore a nude body suit found at a dance supply store online, and if it had been cooler, probably would've purchased something similar for my baby girl. Fortunately the fleece is pretty warm, so these outfits aren't as chilly as they may seem!
More on Babble:


